
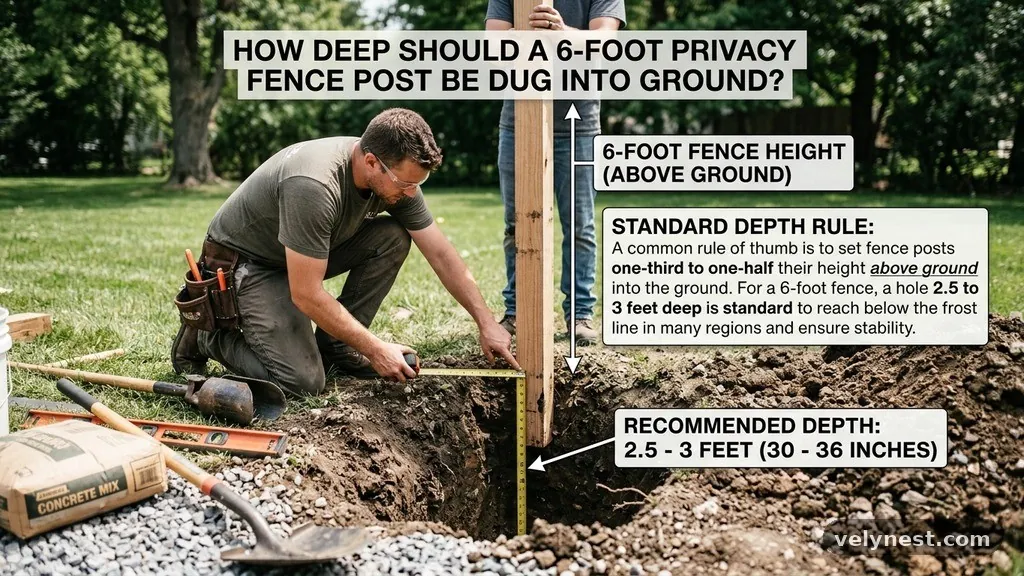
How Deep Should a 6-Foot Privacy Fence Post Be Dug into the Ground?
Determining how deep should a 6-foot privacy fence post be dug into the ground is the most critical step in ensuring your barrier remains upright and stable for years. Many homeowners assume that a shallow hole is sufficient for a standard privacy fence, but failing to reach the proper depth leads to leaning, wobbling, and eventual structural collapse.
By understanding the physics of soil pressure and wind resistance, you can avoid costly repairs. Whether you are installing wood panels or vinyl fencing, this guide provides the specific measurements and professional techniques required to secure your property boundaries effectively and safely.
The Standard Depth Rule
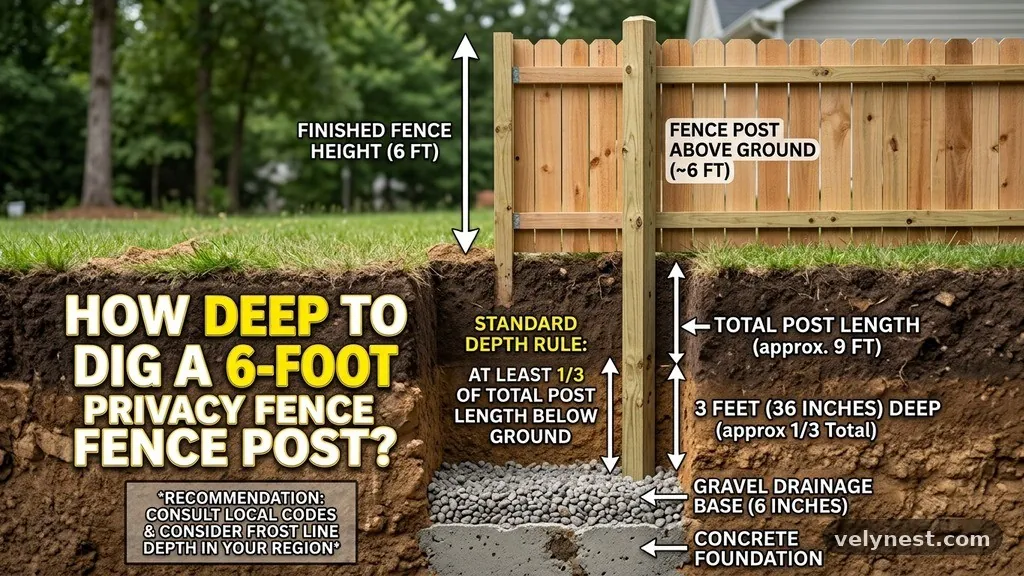
For a standard 6-foot privacy fence, the general rule of thumb is to bury one-third of the total post length below the surface. This means that for a 6-foot fence, you should aim for a hole depth of at least 24 to 30 inches. While some may argue that 24 inches is sufficient, deeper is almost always better for long-term stability.
If you are using 8-foot posts to accommodate the 6-foot fence height, you have two feet of post underground and six feet above. This 2-foot burial depth is the absolute minimum requirement for stability in stable soil conditions. However, if your area experiences high winds or soft ground, increasing this depth to 30 or even 36 inches provides a much higher margin of safety.
Accounting for the Frost Line
The frost line is the depth to which the groundwater in the soil is expected to freeze during the winter. If you live in a region with cold winters, you must dig your post holes below this line to prevent “frost heave.” Frost heave occurs when water in the soil freezes and expands, physically pushing your fence posts upward out of the ground.
If your post is anchored only in the top layer of soil, the expansion will eventually lift the post, leaving it uneven once the ground thaws. You can check your local building codes or consult the National Weather Service climate data to identify the frost line depth for your specific county. In many northern states, this might require digging as deep as 48 inches, which far exceeds the standard one-third rule.
Soil Composition and Stability
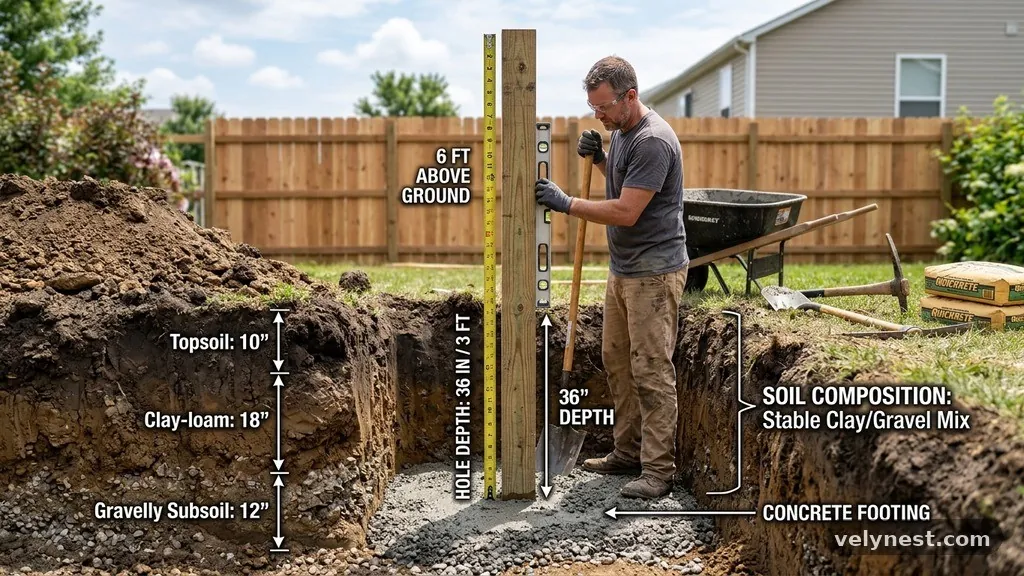
The type of dirt on your property significantly impacts how deep your holes need to be. Sandy or loose soil lacks the friction necessary to hold a post firmly in place, requiring you to dig deeper to reach more compact, stable earth. Conversely, heavy clay provides excellent grip but can trap moisture, which leads to wood rot if not properly managed.
If you find that your soil is consistently soft or prone to shifting, consider widening the diameter of the hole rather than just focusing on depth. A wider hole allows for a larger concrete footing, which increases the surface area against the soil. This prevents the post from rocking back and forth during wind gusts.
The Role of Concrete Footings
Concrete is essential for locking your posts into a fixed position. Simply backfilling a hole with dirt will almost always result in a loose fence within a few seasons. When you pour concrete, you create a solid anchor that distributes the pressure exerted by the fence panels across a wider area of the soil.
To achieve the best results, your hole should be at least three times the diameter of the post itself. For a standard 4×4 post, this means a hole diameter of roughly 10 to 12 inches. Filling this space with high-quality concrete ensures that the post does not move when the panels catch the wind.
Wind Load and Fence Surface Area
A 6-foot privacy fence acts like a giant sail during a storm. Because privacy panels have no gaps to let air pass through, the wind force is transferred directly to the posts. If your posts are not deep enough, this leverage will eventually snap them or pull them out of the ground.
In areas prone to severe storms or high-altitude gusts, you should increase your burial depth by an additional 6 inches beyond the standard recommendation. This extra depth acts as a counterweight against the force of the wind. It is a small amount of extra labor that saves you from having to replace the entire fence after a single bad season.
Tools for Precise Digging
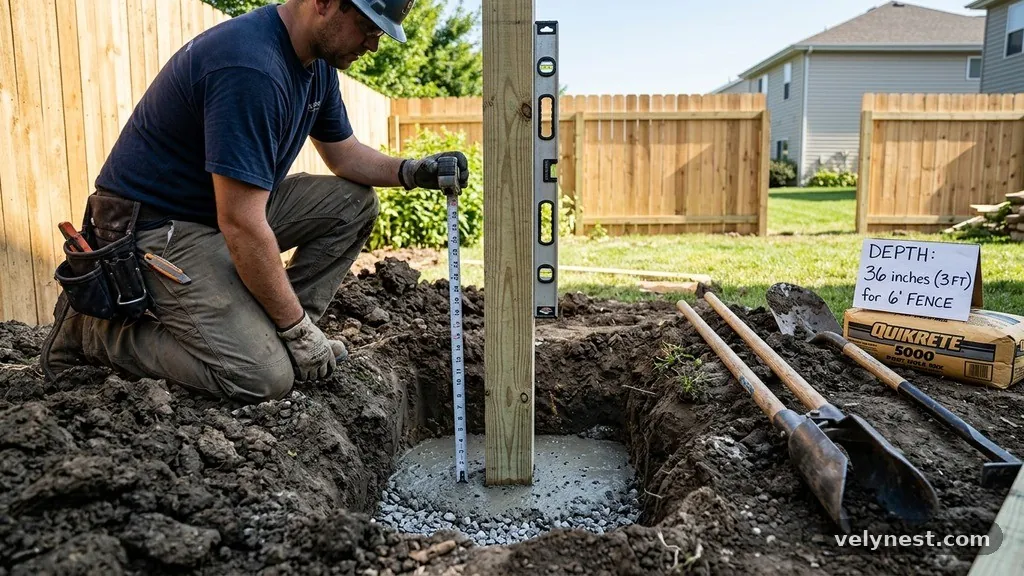
Manual post-hole diggers are effective for small projects, but they can be exhausting if you have to dig 30 inches deep for dozens of posts. For larger projects, renting a power auger is a significant time-saver. These machines allow you to drill uniform holes at the exact depth you need without the back-breaking labor of manual shoveling.
Always check for underground utility lines before you begin digging. In many jurisdictions, you are legally required to call your local utility marking service at least 48 hours before breaking ground. Striking a water or electrical line is not only dangerous but can lead to significant fines and repair costs.
Comparison of Post Burial Depth Requirements
The following table highlights how different soil types and environmental factors influence your decision on how deep to dig. These are general guidelines intended to help you plan your installation strategy for maximum durability.
| Soil/Condition Type | Recommended Burial Depth | Concrete Necessity |
|---|---|---|
| Stable, Compacted Soil | 24 inches | High |
| Loose, Sandy Soil | 30–36 inches | High |
| High-Wind Exposure | 30–36 inches | Required |
| Cold Climate (Frost Line) | Below Frost Line | Required |
Managing Drainage to Prevent Rot
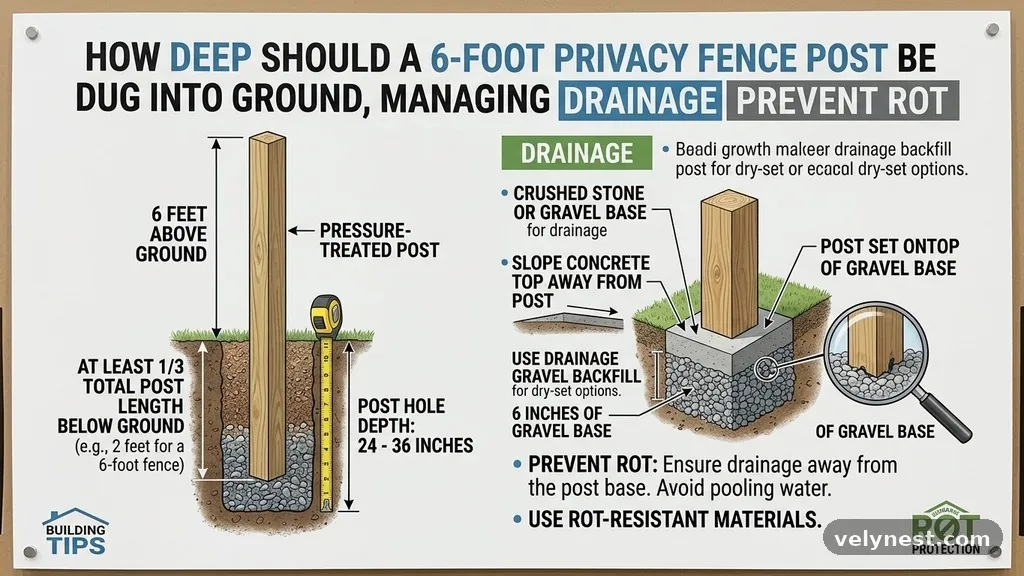
Even if your posts are deep enough, they will fail if they rot prematurely. Water pooling at the bottom of a hole is the primary cause of wood post failure. To prevent this, place 4 to 6 inches of gravel at the bottom of the hole before inserting the post.
The gravel allows water to drain away from the base of the wood or metal post rather than sitting against it. This simple step significantly extends the life of your installation. Combined with a concrete slope at the surface, which diverts rainwater away from the post, you create a system that stays dry and secure.
Common Installation Mistakes
One of the most frequent errors is failing to plumb the post correctly before the concrete sets. Once the concrete is poured, you have a very limited window to make adjustments. Using a post level is a non-negotiable step to ensure your fence is perfectly vertical.
Another mistake is using too little concrete. Some installers attempt to save money by using only a few bags per hole, resulting in a thin, weak footing that cracks under pressure. Always follow the manufacturer’s instructions for the specific concrete mix you choose to ensure it reaches its full strength.
Best Practices for Maintenance
Once your fence is installed, regular maintenance is key to keeping it standing. Check the posts annually for signs of movement or tilting. If you notice a post starting to lean, it is much easier to shore it up immediately than to wait until the entire section of the fence collapses.
Keep the area around the base of your posts clear of excessive mulch or debris that might hold moisture. Ensuring that the soil around the base remains firm and compacted will prevent the post from developing a “wobble” over time. Taking these small steps will ensure your fence remains a sturdy asset for your property.
Frequently Asked Questions
Does the post material change the required depth?
While the burial depth remains similar for both wood and vinyl, the way you anchor them differs. Wood posts are often set directly in concrete, whereas vinyl posts frequently require a wood insert or a specialized steel pipe to add structural rigidity. Always check the manufacturer’s installation manual, as they may have specific depth requirements for their warranty to remain valid.
Can I use post spikes instead of digging holes?
Post spikes are metal sleeves driven into the ground, but they are generally discouraged for 6-foot privacy fences. Because privacy fences catch so much wind, spikes rarely provide the necessary lateral support to keep the fence from leaning. Digging a proper hole and using concrete is the only way to guarantee long-term stability for a full-height privacy structure.
What if I hit a rock while digging?
Hitting a large rock is a common frustration, but you shouldn’t just stop at that depth. You may need to use a pry bar to break the rock or a rock-specific auger bit to get through. If the obstacle is truly immovable, you might need to shift the post location slightly, though this requires re-measuring your panel spacing to ensure they still fit perfectly.
How long should I wait before attaching panels?
You should allow the concrete to cure for at least 48 hours before attaching any fence panels. Putting weight on the posts while the concrete is still setting can cause them to shift, ruining your alignment. Be patient during this curing phase to ensure that your hard work results in a perfectly straight, professional-looking fence.
Do I need a permit for a 6-foot fence?
Most municipalities require a building permit for any fence taller than 4 or 5 feet. A 6-foot privacy fence is often subject to local zoning ordinances regarding placement, height, and materials. Always verify your local requirements at the city or county planning office before purchasing materials to avoid potential fines or forced removal.
Conclusion
Securing your fence properly is the difference between a project that lasts a decade and one that requires repairs within the year. By ensuring your hole depth matches the specific soil and wind conditions of your property, you create a foundation that can withstand the elements. Remember that the standard recommendation of burying one-third of the post length is your starting point, not necessarily the finish line.
Always consider local frost lines and soil stability before you start your construction. If you take the time to dig correctly, use high-quality concrete, and ensure proper drainage, you will have a durable privacy barrier that adds value and security to your home for many years to come.